The kitchen is often considered the heart of the home, where meals are prepared, memories are made, and families gather. However, as time passes, kitchen cabinets can become outdated and lose their luster, transforming what was once a vibrant space into a dull and uninspiring area. Fortunately, there is a cost-effective and efficient solution to revitalize your kitchen without undergoing a complete renovation: kitchen spraying. This method can breathe new life into your cabinets, turning them from dull to dazzling. In this article, we will explore the benefits, process, and tips for kitchen spraying to help you refresh your cabinets and rejuvenate your kitchen.
Understanding Kitchen Spraying
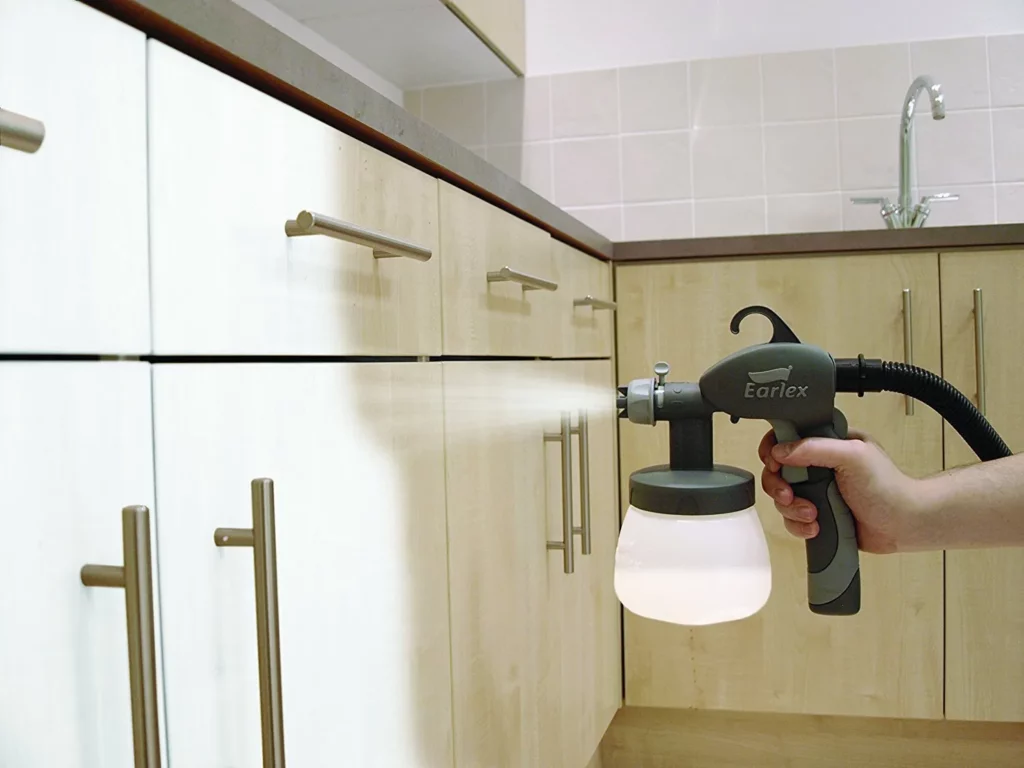
Kitchen spraying involves applying a fresh coat of paint or finish to your existing cabinets using a spray gun. This technique ensures a smooth, even, and professional finish, which is often difficult to achieve with traditional brush painting. Kitchen spraying can be used on various cabinet materials, including wood, MDF (medium-density fiberboard), laminate, and metal.
Benefits of Kitchen Spraying
- Cost-Effective: One of the most significant advantages of kitchen spraying is its affordability. Compared to a full kitchen remodel or replacing cabinets, spraying offers a budget-friendly alternative that delivers impressive results.
- Time-Efficient: Kitchen spraying is a relatively quick process. Depending on the size of your kitchen and the complexity of the job, the entire project can often be completed in a few days. This minimizes disruption to your daily routine.
- Eco-Friendly: By opting for kitchen spraying, you are contributing to a more sustainable approach. Reusing your existing cabinets reduces waste and the demand for new materials, making it an environmentally conscious choice.
- Customization: With kitchen spraying, you have the freedom to choose from a wide range of colors and finishes. Whether you prefer a classic, modern, or eclectic look, you can tailor your cabinets to match your style and personality.
- Enhanced Aesthetics: A fresh coat of paint can dramatically transform the appearance of your kitchen. Kitchen spraying can cover up imperfections, scratches, and stains, giving your cabinets a brand-new look.
The Kitchen Spraying Process
To achieve professional results, it’s essential to follow a systematic approach to kitchen spraying. Below is a step-by-step guide to help you understand the process.
Step 1: Preparation
Proper preparation is crucial for a successful kitchen spraying project. This stage involves several key tasks:
- Cleaning: Thoroughly clean the cabinets to remove grease, grime, and dirt. A mixture of warm water and mild detergent works well for this purpose. Rinse and let them dry completely.
- Removing Hardware: Take off all cabinet doors, drawers, and hardware, such as handles and hinges. Label each piece to ensure easy reassembly.
- Sanding: Lightly sand the surfaces of the cabinets to create a smooth base for the paint to adhere to. Use fine-grit sandpaper and wipe away any dust with a damp cloth.
- Masking: Protect surrounding areas, such as countertops, appliances, and floors, by covering them with plastic sheets or painter’s tape. This step prevents overspray and keeps your kitchen clean.
Step 2: Priming
Applying a primer is essential to ensure the paint adheres well and provides a durable finish. Choose a high-quality primer suitable for your cabinet material. Here’s how to do it:
- Applying Primer: Use a spray gun to apply an even coat of primer to the cabinet surfaces. Hold the spray gun at a consistent distance to avoid drips and uneven coverage.
- Drying Time: Allow the primer to dry completely according to the manufacturer’s instructions. This usually takes a few hours but can vary depending on the product.
- Sanding: Once the primer is dry, lightly sand the surfaces again to ensure a smooth finish. Wipe away any dust with a tack cloth.
Step 3: Painting
With the preparation and priming complete, it’s time to apply the paint. Selecting the right type of paint is crucial for achieving a professional finish. Acrylic, latex, and oil-based paints are popular choices for kitchen cabinets.
- Choosing Paint: Select a high-quality paint that is durable and resistant to moisture and stains. Satin, semi-gloss, and gloss finishes are ideal for kitchen cabinets due to their easy-to-clean properties.
- Applying Paint: Using a spray gun, apply the paint in thin, even coats. Start with the cabinet frames and then move on to the doors and drawers. Maintain a consistent distance from the surface and use smooth, sweeping motions to avoid streaks and drips.
- Drying Time: Allow each coat of paint to dry thoroughly before applying the next one. Multiple thin coats are preferable to one thick coat for achieving a smooth and even finish.
- Final Sanding: After the final coat of paint is dry, lightly sand the surfaces one last time to ensure a flawless finish. Wipe away any dust with a tack cloth.
Step 4: Reassembly
Once the painting process is complete and the paint is fully cured, it’s time to reassemble your kitchen cabinets.
- Reattaching Hardware: Carefully reattach the cabinet doors, drawers, and hardware. Ensure that everything is properly aligned and functions smoothly.
- Final Touches: Inspect the cabinets for any touch-ups or adjustments that may be needed. Make sure the paint is even and all surfaces are covered.
Tips for Successful Kitchen Spraying
To achieve the best results with your kitchen spraying project, consider the following tips:
- Invest in Quality Tools: A high-quality spray gun and paint will make a significant difference in the outcome of your project. Investing in good tools ensures a professional finish.
- Practice First: If you are new to using a spray gun, practice on a piece of cardboard or scrap wood before spraying your cabinets. This helps you get comfortable with the tool and achieve even coverage.
- Work in a Well-Ventilated Area: Proper ventilation is essential when working with paints and primers. Ensure your workspace is well-ventilated to avoid inhaling fumes.
- Take Your Time: Rushing the process can lead to mistakes and a subpar finish. Take your time with each step, allowing adequate drying and curing times for the best results.
- Consult a Professional: If you are unsure about any part of the process or want to ensure a flawless finish, consider consulting a professional kitchen spraying service. They have the expertise and equipment to deliver exceptional results.
Maintaining Your Newly Sprayed Cabinets
After investing time and effort into refreshing your kitchen cabinets, it’s important to maintain their appearance and durability. Here are some tips for keeping your newly sprayed cabinets looking their best:
- Regular Cleaning: Wipe down your cabinets regularly with a soft, damp cloth to remove dust and grime. Avoid using harsh chemicals or abrasive cleaners that can damage the finish.
- Avoid Excess Moisture: While kitchen cabinets are designed to withstand moisture, excessive exposure can cause damage over time. Wipe up spills promptly and ensure proper ventilation in your kitchen.
- Handle with Care: Be mindful of how you handle your cabinets to prevent scratches and chips. Use gentle pressure when opening and closing doors and drawers.
- Touch-Up Kits: Keep a touch-up kit with matching paint on hand for minor repairs. Addressing small chips and scratches promptly can prevent further damage and maintain the overall appearance.
Conclusion
Kitchen spraying is a transformative and cost-effective solution for revamping your kitchen cabinets. By following a systematic approach and paying attention to detail, you can achieve a professional finish that breathes new life into your space. Whether you choose to tackle the project yourself or enlist the help of a professional, the results can be truly dazzling, turning your dull cabinets into a focal point of your home. With proper maintenance, your newly sprayed cabinets will continue to shine and enhance the beauty of your kitchen for years to come.