A kitchen makeover can transform one of the most important spaces in your home, adding value and enhancing your daily living experience. However, traditional kitchen renovations can be costly and time-consuming. Enter kitchen spraying—a cost-effective, efficient, and impactful way to revamp your kitchen without breaking the bank. In this comprehensive guide, we’ll explore the power of kitchen spraying, its benefits, the process, and how you can achieve stunning results on a budget.
Understanding Kitchen Spraying
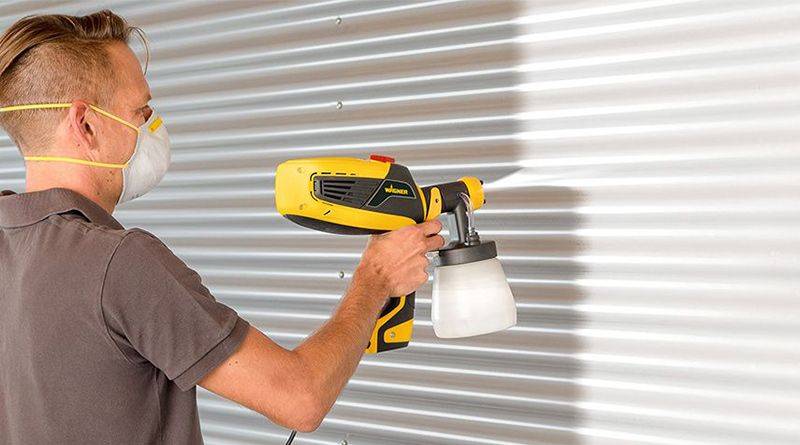
Kitchen spraying involves using a spray gun to apply paint or lacquer to surfaces such as cabinets, drawers, and sometimes even countertops and appliances. This method offers a smooth, professional finish that is often superior to traditional brush or roller painting.
Benefits of Kitchen Spraying
- Cost-Effective: Spraying your kitchen is significantly cheaper than replacing cabinets or undergoing a full renovation.
- Time-Efficient: The process is quicker compared to other renovation methods, often taking just a few days.
- High-Quality Finish: Spraying provides a flawless, even finish that can mimic the look of new cabinets.
- Customization: You can choose from a wide range of colors and finishes to match your style.
- Less Disruption: Minimal disruption to your daily life compared to extensive renovations.
Planning Your Kitchen Spraying Project

Setting a Budget
Determine how much you’re willing to spend on your kitchen makeover. Factors to consider include:
- Paint/Lacquer Costs: Quality paint or lacquer is essential for a durable finish.
- Equipment Rental or Purchase: Depending on whether you hire a professional or do it yourself.
- Labor Costs: If hiring a professional, labor costs will be a significant part of your budget.
Choosing Colors and Finishes
Selecting the right colors and finishes is crucial for achieving the desired look:
- Color Trends: Consider current color trends but also think about timeless choices that won’t quickly go out of style.
- Finish Options: Matte, satin, semi-gloss, and high-gloss finishes each offer different looks and durability levels.
Hiring a Professional vs. DIY
Decide whether to hire a professional or tackle the project yourself:
- Professional Services: Ensure a high-quality finish but come at a higher cost.
- DIY: More budget-friendly but requires time, effort, and a learning curve.
The Kitchen Spraying Process
Preparation
Proper preparation is key to a successful kitchen spraying project:
- Clear the Area: Remove all items from cabinets and clear countertops.
- Clean Surfaces: Thoroughly clean cabinets and surfaces to remove grease, grime, and dust.
- Sand Surfaces: Lightly sand surfaces to ensure the paint adheres properly.
- Masking and Taping: Protect areas that won’t be painted, such as walls, floors, and appliances, with masking tape and plastic sheeting.
Priming
Priming is essential for achieving a long-lasting finish:
- Choose the Right Primer: Use a primer suitable for your cabinet material (wood, laminate, etc.).
- Apply Evenly: Use a spray gun to apply an even coat of primer, ensuring all surfaces are covered.
Painting
The main event of your kitchen spraying project:
- Use Quality Paint: Invest in high-quality paint or lacquer for the best results.
- Apply Thin Coats: Multiple thin coats are better than one thick coat. Allow each coat to dry before applying the next.
- Consistent Technique: Maintain a consistent spraying technique to avoid drips and uneven coverage.
Finishing Touches
After the paint has dried, it’s time for the finishing touches:
- Inspect for Flaws: Check for any imperfections and touch up as needed.
- Reassemble Cabinets: Once fully dry, reattach cabinet doors, drawers, and hardware.
- Final Clean-Up: Remove masking tape and plastic sheeting, and clean up any remaining dust or debris.
Budget-Friendly Tips and Tricks
Opt for DIY
Doing it yourself can save a significant amount of money:
- Equipment Rental: Rent a spray gun and other necessary equipment instead of buying.
- Online Tutorials: Utilize free online resources and tutorials to learn the spraying technique.
Use Quality Materials
Investing in quality materials can save money in the long run:
- Durable Paints: High-quality paints and lacquers last longer and require fewer touch-ups.
- Proper Tools: Using the right tools ensures a professional finish, reducing the likelihood of mistakes.
Repurpose and Upcycle
Incorporate repurposing and upcycling into your makeover:
- Reuse Hardware: Clean and spray existing hardware instead of buying new.
- Add Trim: Add decorative trim or molding to existing cabinets for a fresh look.
Shop Smart
Be strategic about where and how you buy materials:
- Sales and Discounts: Look for sales, discounts, and coupons at home improvement stores.
- Bulk Purchases: Buy paint and materials in bulk to save money.
Maintaining Your Sprayed Kitchen
Proper maintenance ensures your sprayed kitchen stays beautiful for years:
- Regular Cleaning: Wipe down cabinets regularly with a soft cloth and mild cleaner.
- Avoid Harsh Chemicals: Use gentle cleaning solutions to prevent damage to the finish.
- Touch-Ups: Keep some paint on hand for quick touch-ups of any chips or scratches.
- Handle with Care: Avoid banging or slamming cabinet doors to maintain the integrity of the paint.
Real-Life Examples and Success Stories
Hearing about real-life experiences can inspire and guide your own project. Here are a few examples of budget-friendly kitchen makeovers achieved through spraying:
Sarah’s Modern Makeover
Budget: $500
Duration: 3 Days
Sarah transformed her dated kitchen into a modern space by spraying her oak cabinets with a sleek, matte gray finish. She opted for DIY, renting equipment and using online tutorials to guide her. The result was a professional-looking kitchen that felt brand new, all within modest budget.
Tom and Lisa’s Classic White Kitchen
Budget: $800
Duration: 5 Days
Tom and Lisa hired a professional to spray their dark, heavy cabinets with a bright white lacquer. They chose a semi-gloss finish for durability and easy cleaning. The transformation was stunning, making their kitchen feel larger and more inviting. The couple also replaced the hardware with budget-friendly, modern handles, completing the fresh look.
DIY Enthusiast Mark’s Bold Choice
Budget: $400
Duration: 4 Days
Mark, a DIY enthusiast, decided to go bold with a navy blue spray paint for his cabinets. He carefully prepped and primed the surfaces, ensuring a smooth application. The deep, rich color added a dramatic flair to his kitchen, complemented by brass hardware he polished himself. The project was a testament to how impactful color can be in a kitchen makeover.
Conclusion
Kitchen spraying is a powerful tool for achieving a budget-friendly kitchen makeover. It offers a cost-effective, time-efficient, and highly customizable solution for those looking to refresh their kitchen without undergoing a full renovation. By understanding the process, choosing the right materials, and applying proper techniques, you can transform your kitchen into a stunning, modern space that reflects your personal style.
Whether you choose to hire a professional or take on the project yourself, the key to success lies in meticulous preparation, quality materials, and consistent maintenance. Embrace the power of kitchen spraying and enjoy the rewards of a beautiful, revamped kitchen that stands the test of time.
Frequently Asked Questions:
How long does kitchen spraying take?
The timeframe for kitchen spraying depends on the size and condition of the kitchen, but most projects are completed in two to five days. Professionals typically remove doors and drawer fronts for off-site spraying while spraying the fixed parts like frames and panels on-site. This organized process helps ensure minimal disruption to your home and faster turnaround times compared to other renovation methods.
Is kitchen spraying durable?
When carried out by professionals, kitchen spraying is extremely durable. Experts use high-performance paints that are designed to resist moisture, heat, and everyday wear and tear. Proper surface preparation, including cleaning, sanding, and priming, ensures the new finish bonds strongly to the existing surface. With the right care, professionally sprayed cabinets can maintain their appearance for 8–10 years or longer.
Can any type of kitchen cabinets be sprayed?
Almost any kitchen cabinet material can be sprayed, including solid wood, MDF, laminate, and UPVC. The key is correct surface preparation and the use of suitable primers and paints tailored to the material. Professionals assess the condition of your cabinets beforehand and advise on the best approach to achieve an outstanding and lasting finish.
Is kitchen spraying cheaper than replacing cabinets?
Yes, kitchen spraying is significantly more cost-effective than replacing or refacing cabinets. Full replacement involves the cost of new materials, labor, removal, and installation, while spraying refreshes what you already have. It gives the appearance of a brand-new kitchen at a fraction of the cost, making it an excellent option for homeowners looking to modernize without overspending.
Will there be a lot of mess and fumes?
Professional kitchen sprayers use dust sheets, masking tape, and extraction systems to contain overspray and maintain cleanliness. High-quality, low-odor paints are also used to minimize strong smells. Most of the messy work is done off-site where possible, and when spraying on-site, professionals carefully prepare the space to protect appliances, countertops, and floors, ensuring a tidy and stress-free process.
Can I choose any color for my sprayed kitchen?
Yes, you have a wide range of color options when spraying your kitchen. Professionals typically offer extensive color charts, from classic neutrals to bold, contemporary shades. They can also match bespoke colors if you have a particular look in mind. Finishes range from matte and satin to high gloss, allowing you to customize your kitchen according to your style.
How long before I can use my kitchen again after spraying?
After spraying, cabinets are usually dry to the touch within a few hours. However, it is recommended to wait at least 24 to 48 hours before reinstalling doors and using the kitchen normally. Full curing, which gives the paint its maximum hardness and durability, can take up to two weeks. During this time, it’s best to handle surfaces with care to avoid damaging the new finish.